
Mistakes in data recording have never been more costly than they are today. Spatial data helps aircraft to fly safely, money is stored on a server and reflected as numbers on a screen, and the odometer reading on a vehicle helps determine its value. Society generally accepts these co-ordinates, figures and numbers as true, so when they differ from reality, it can lead to chaos and unwise decisions.
By comparison, recording soil sampling data accurately and using proper sampling equipment may seem insignificant. However, whether it’s choosing the location for a new home or rotating crops that feed an entire country, the data will be used to make important, long-lasting decisions.
Thankfully, the world of soil sampling is not as time-sensitive as it is for a plane midflight; ample opportunities exist to use collection equipment precisely, and record, check and recheck data. With soil quality judged by the data derived from the sample, it’s essential to record data and practise accurate collection procedures at every opportunity. Properly implementing a few fundamental pieces of equipment and recording basic elements during sampling can save time, reduce cost and streamline operations for experienced geotechnical engineers and those just breaking into soil sampling.
The Minnesota Pollution Control Agency and the U.S. Environmental Protection Agency have established guidelines and data crucial to an accurate and thorough soil sampling project, much of which can be recorded in the field before the sample is tested in a lab. Establishing a recording system before entering the sample site is crucial to accurate data recording and prompts the need for a dedicated soil sample log and pre-labelled containers. Preparing materials beforehand can allow a contractor to focus on recording data accurately and implementing the proper sampling equipment, like cathead kits, safety hammers and split spoon samplers, instead of fumbling through the process.
Unique identifier
Start by assigning the overall sample area a unique identifier, such as Sample Area One or SA-1. From there, the terrain layout and soil sample requirements will largely dictate the labelling method used, but sample areas can be broken down further into sample sites, like SS-1, SS-2 and so on. Borings can then be assigned to specific sample sites within the overall sample area. For example, SS-1 can contain borings 1-12, or B-1, B-2, etc., with the individual boring containers and the logbook labelled with this information.
Establishing a recording system before entering the sample site is crucial to accurate data recording and prompts the need for a dedicated soil sample log and pre-labelled containers.
Referencing and recording data will be much more fluid after establishing an identification system like the one above. From there, the contractor can decide what specifics should be recorded on the individual sample containers and what should be in the logbook. For example, recording boring co-ordinates, dates and times in both locations is good practice.
Date and time
Once containers have a label, the logbook is set up and data recording priorities have been established, contractors should note the date and time they arrive at the sample area, and the times for every boring within a sample site. For example, a contractor arrives at SA-1 at 9 a.m., takes their first boring, B-1, at the first sample site, SS-1, at 9:15 a.m., the second boring at 9:20 a.m., etc. Be sure to record the last boring time along with the time range for the sample site, SS-1, before moving on to SS-2 and restarting the process. With soil conditions constantly changing, the tiniest detail from time of year to time of day can impact the results and how they are interpreted.
Soil and weather conditions
Take note of the weather conditions upon arriving at the sample area and consider how these may change during the collection process. Also, note the soil conditions. Depending on soil type or conditions, a contractor may divide a sample area into sample sites, but individual boring conditions can still vary. Soil colour should also be noted, as it can give clues to the mineral content and soil condition.
Soil condition descriptors can be anything relevant, such as smooth, gritty, sand, clay, etc. At this point, soil conditions can also allude to specialty equipment requirements and techniques that may be needed.
Sampling techniques, drill type, boring depth and more
If soil is determined to be sandy and loose, this may call for switching to a hollow stem auger, which creates a natural casing in the soil and protects the sample from contamination by the unstable surrounding soil. A hollow stem auger’s centre rod and plug can be removed, providing a clean path to insert a soil sampler. If the environment makes this equipment change necessary, record it in the notes.
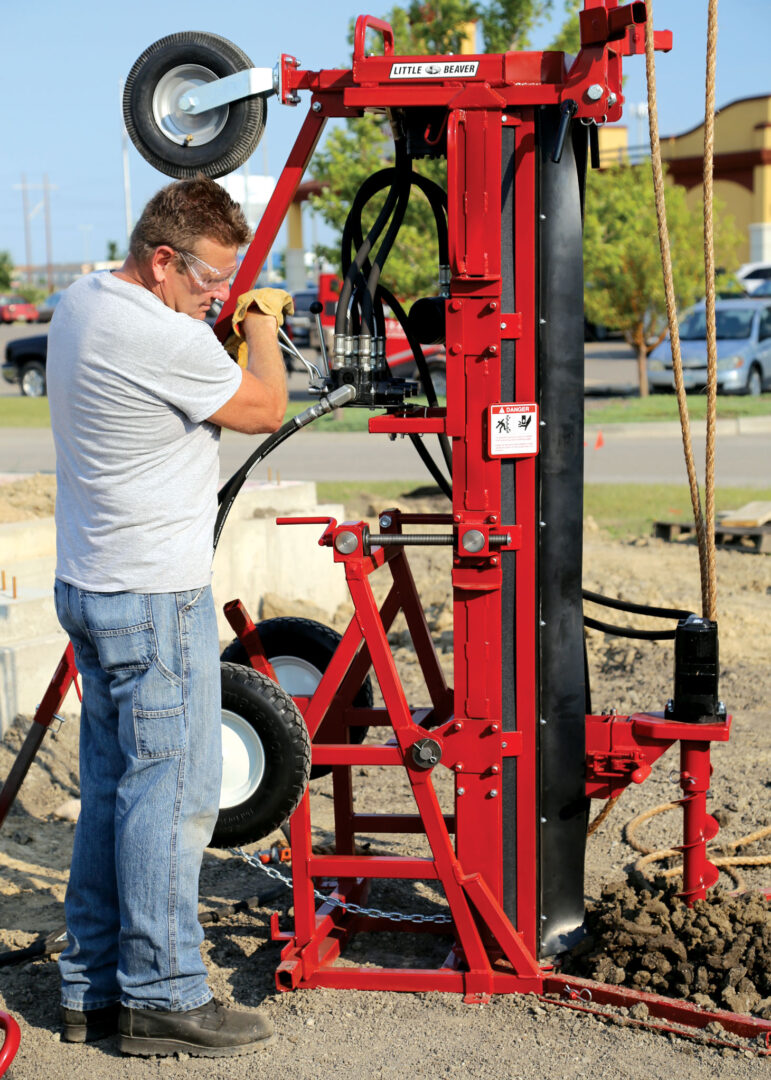
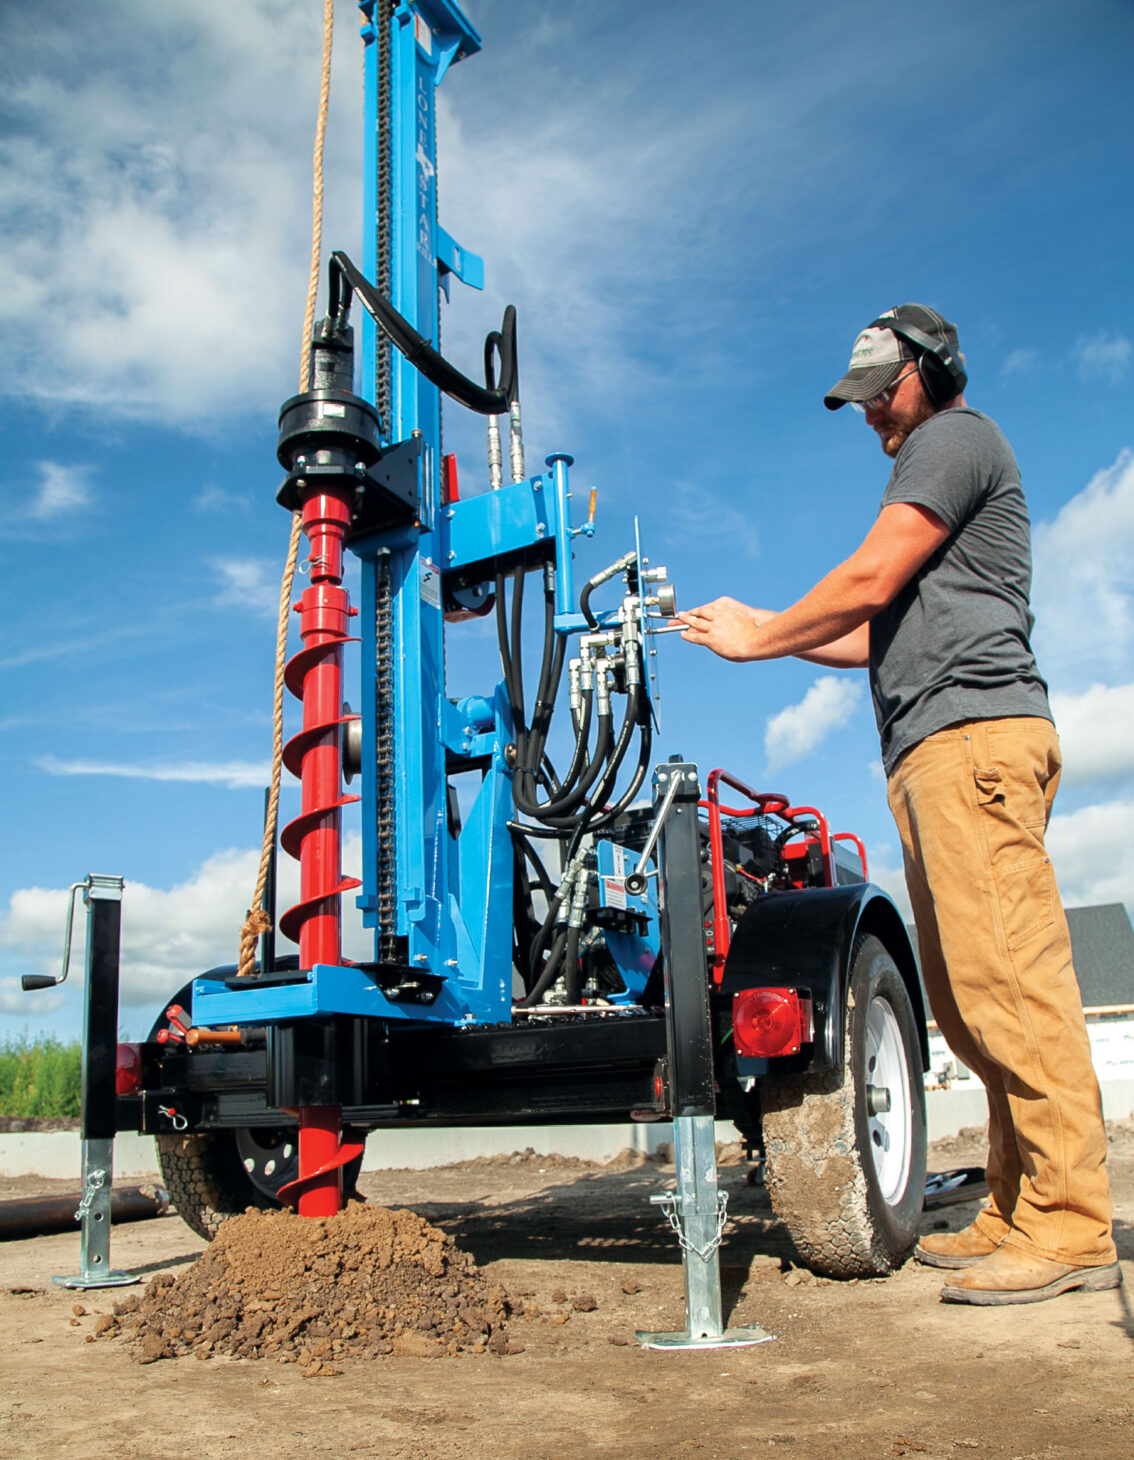
A sandy and confined environment may also call for a more manoeuvrable drill, such as a hydraulic earth drill or post-hole digger. These drills can be paired with tripod kits to ensure accurate sampling of 35 feet. More robust drills can sample in tough clay and remain manoeuvrable and compact by using stabilizing legs, tower kits, cathead kits and manual safety hammers to reach depths down to 100 feet.
Truck-and trailer-mounted drill options can reach similar depths. These may come with automatic hammers to ensure accuracy and make quick work of tough soils in more easily accessed sample sites. Look for original equipment manufacturers that pair soil sampling accessories with their drills to ensure compatibility, straightforward setup and smooth operation.
Record any equipment changes due to changing soil conditions, whether switching augers, using hand sampling tools or bringing in an entirely different drill rig. This will make a good reference for later to trace irregular sample results back to possible equipment-soil mismatches.
Equipment model names and drill types are also important to note. This may be the same for an entire sample area or change from site to site based on the soil conditions and sample requirements. For example, a contractor may use a hydraulic earth drill to reach a target depth and then use a manual or automatic safety hammer to drive in a split spoon sampler. These are all essential aspects of the sampling process that should be recorded. This helps in case of sampling anomalies or user errors, such as forgetting to discard the top few inches of a sample from a split spoon taken without using a hollow stem auger, as this commonly contains material that has dislodged from the walls of the borehole.
Record any equipment changes due to changing soil conditions, whether switching augers, using hand sampling tools or bringing in an entirely different drill rig.
Additionally, note the borehole depth and size of the soil sampler. Such as, “B-1 taken at a borehole depth of 20 feet with a 24-inch split spoon sampler.” At this point in data recording, consider noting the blow counts needed to drive in the soil sampler to the desired depth. This should be noted for every borehole.
Photos, photos, photos
Photos are an important part of the documentation process. While the camera on a smartphone will do, a dedicated field-ready camera with proper weather sealing and a removable memory card is ideal for collecting photos throughout the sampling process. Take landscape shots of the sample area to have them on hand for cross-referencing with a map and boring co-ordinates for later confirmation or questions that may arise after testing. Pictures of the sampling process at every borehole can also be helpful and shed light on mistakes when reviewed later. Additionally, the surrounding soil, the entire soil sample and any individual sections chosen from the sample should be photographed for later reference and note-taking confirmation. The camera used for site photography can also provide an excellent third source for referencing soil date and time, in addition to the logbook and containers.
Handling the sample
Different industries and contractors establish their own standard operating procedures for handling and storing samples. An overall guidance to not alter the sample’s chemical properties is generally followed based on which properties are of interest. However, an airtight container for storage in the field is essential. Place the samples in the shade, preferably in a cooler, until they can be refrigerated or sent to a lab. Individual labs may offer further shipping and storage recommendations.
While the impact of soil sampling may seem to rely solely on trusted systems, like a testing lab, to provide reliable data, it’s important to remember that the person in the field is still flying the plane. A contractor’s actions will determine how closely the soil sample at the lab represents the soil at the jobsite. A well-constructed soil sample log, diligent note-taking and proper sampling equipment will ensure every borehole counts, and any decisions made will be wise. ![]()